Portals / How to Create Portals
MAGIQ Documents portals allow users and administrators to expose important documents to customers, employees and partners over the web or the local intranet.
Follow these easy steps to create a new portal:
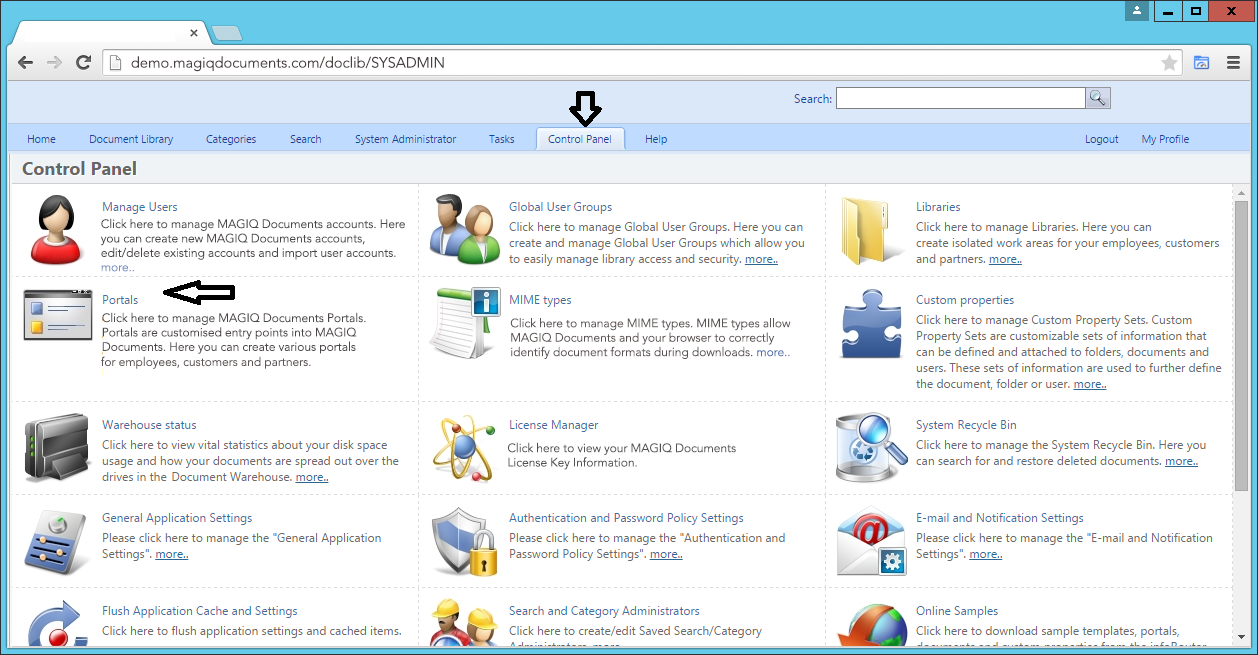
- Navigate to the "Control Panel"
- Click on the "Portals" link.
- Click on the "New" link located in the left sidebar.
- In the "New Portal" window, perform the following
- Select a "Template" portal from the "Model Portal" drop down control. The default template that is used when creating a new portal is called "Template". You may choose any of the available portals as your starting point by selecting it as your "Model Portal".
- Enter a "Name" for the new portal.
- Click "Ok" to create the new portal.
- Notice that the new portal will be displayed in the home tab.
- The new portal will be in design mode so you can start editing the portal immediately.
- When you are done making your edits, click on the "Release changes" link located in the bottom blue bar.
Setting up Portal Administrators:
The System Administrator may assign "Portal Administrators" to manage the day-to-day maintenance of portals. Portal Administrators can edit portals, design the layout of portals, and make changes to the gadgets.
To create or manage "Portal Administrators" perform the following:
- Navigate to the "Control Panel"
- Click on the "Portals" link.
- Select the portal to which you wish to assign a portal administrator.
- Click on the "Portal Administrators" link located in the left sidebar.
- The "Portal Administrators" window will appear.
- Click on the "Add Administrator" button.
- Select one or more users from the list that appears.
- Click "Ok" to add the selected users as portal administrators.
